After being back from the holidays, I decided to catch up on some internal webinars I missed in the last part of 2020. While listening to one of the recordings, I grasped an exciting piece of information about a tool to migrate from NVDS to VDS 7.0 in NSX-T 3.1. I’ve been waiting on this tool since the release of NSX-T 3.0, and I was surprised its introduction was not publicized more. After listening more carefully, I realized that the tool is API/CLI only now, and that is probably the reason its release was understated.
That said, the tool is fully supported, and its functionalities are documented in the admin and the API guide, so why not giving it a try.
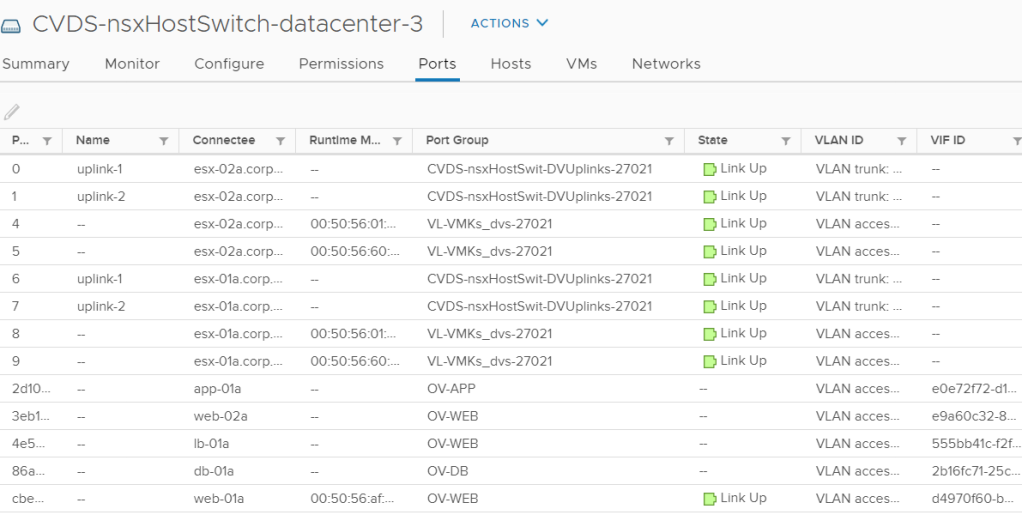
Initial State

In my lab, I have a cluster comprising two hosts. Each host has two physical NICs, both managed by the N-VDS. On this N-VDS, I have 3 Overlay segments for virtual machines and one VLAN segment for the VMK interfaces I use for ESXi management, vMotion, and storage traffic.

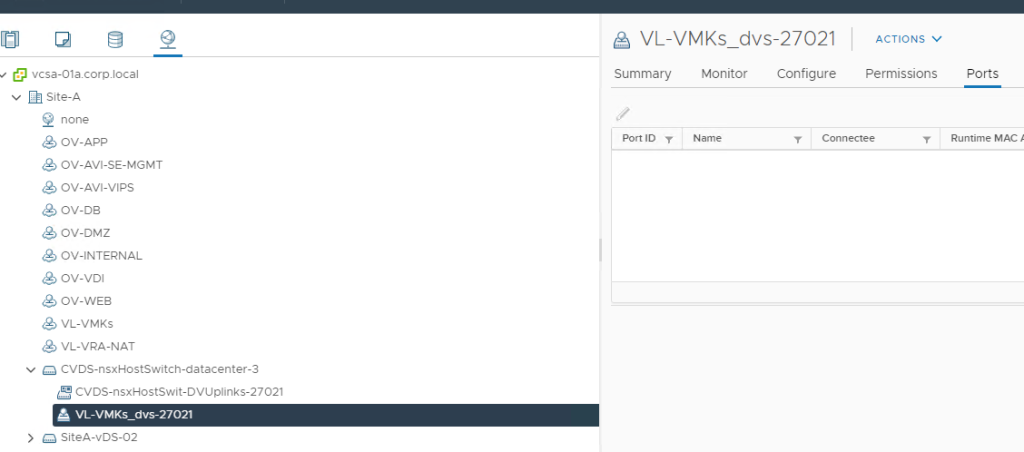
From the NSX CLI on one of the hosts, we can see the segments configured. The single VLAN segment with VLAN ID 0 is where I have my VMK interfaces.


Above, I included some screenshots of the NSX UI depicting the ports on each segment I expect the tool to migrate to the new Virtual Switch.
Run the migration tool

In this example, I run the migration tool via the CLI on NSX Manager. From what I understand, the only thing that is missing in the CLI version than the API is the ability to specify the VDS name to be used for the migration. Besides cosmetic reasons, selecting the name could be crucial if you wish to reuse a VDS already present on the hosts. In my case, I only have the NVDS, so it does not really matter.
- I initialised the tool via the command: vds-migrate precheck
- I then verified the proposed topology via the command: vds-migrate show-topology
- I applied the configuration via the command: vds-migrate apply-topolgy
At this point, no migration has been performed just yet. The tool created the new VDS with the specified name and created a port-group to host the VMK interfaces. We can see that no port exists for the VMK port-group.

I then start the actual migration for my cluster running the command : vds-migrate esxi-cluster-name Cluster-01a

On the NSX side, a temporary Transport Node profile has been created. It uses an NVDS still and will be used to handle the migration only. The tool will later create a new Transport Node Profile leveraging VDS.
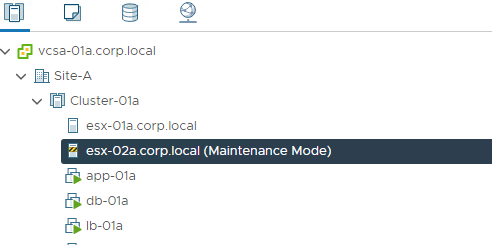
Hosts will be placed in Maintenance Mode for the migration, so it is crucial that DRS is enabled and set to fully automated if you wish to have a zero-touch experience. VMs will not experience downtime as they are vMotioned before each host goes through the migration process.

The new final transport node profile is configured. This one references the VDS created by the tool.
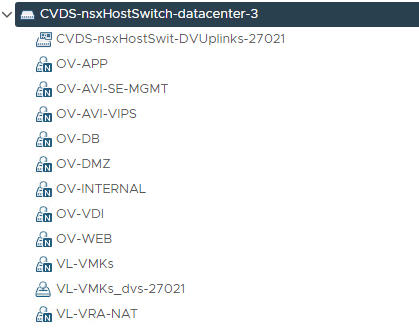
All the segments associated with the transport zones attached to the original transport node profile will appear as NSX managed port-groups on the new VDS.
VMK interfaces and VMs are moved to the VDS port-groups.
Final remarks
The tool did an excellent job in my lab, migrating both VM and VMK ports from the NVDS to the VDS. Even without the UI, the tool is pretty easy to use. If you want to try this in a lab, please refer to the official documentation:
And if you wish to do this in production, please beware of this wording in the documentation:

Have fun!!!

Hi,
I see a difference between the CLI and API.
When using the CLI, will it put the hosts automatically in maintenance to guarantee your vms are still running in production ? Or does it do all hosts at the same time ?
Via API you need to specify the transport node, where with the CLI, you need to specify the cluster.
LikeLike
In my lab, I applied the changes to the whole cluster. Hosts were placed in maintenance mode one after the other to provide maximum uptime. you have the option to specify a host or a list of hosts via the CLI too
LikeLike
It is purely sequential, it will put in maintenance each node after the other.
Like I wrote further, there is a catch because the default “wait for maintenance mode” timeout is pretty short, which will cause HUGE issues if you are using VSAN, don’t mess with this if you are using VSAN since the time required to assure data availability might clearly go beyond this default timeout, in which case the script will just think this node “failed” and will try to put next node in maintenance…which could lead to a vsan disaster.
Actually, you can set optional maintenance timeout timer.
LikeLike
Maybe you could note also that there is an optional switch with the command “vds-migrate esxi-cluster-name ClusterName” that will allow the script to wait for maintenance mode to actually be effective, this could save your life if you try this procedure while VSAN enabled (because by default maintenance mode will wait for data to be moved before being actually in maintenance mode).
Use this command : vds-migrate esxi-cluster-name ClusterName maintenance-timeout XXX
Where XXX seems to be in seconds but could be minutes, not sure. Anyway you can set a ridiculously high value since it is juste a “wait for maintenance mode to be set” switch, once maintenance mode is effective, the script will continue without delay.
LikeLike